How To Apply OSMO PolyX Oil Wood Finish
My name is Tyler Brown, and if you've ever stressed out about applying finishes to your project, you're in the right place. You will learn how to easily apply Osmo PolyX Oil finish for great results and feel confident when applying it on your project. I have personally used the Osmo PolyX Oil wood finish on multiple woodworking projects like tv consoles, beds, decorations, and kid stepstools. I have been incredibly satisfied with the protection it offers and how easy it is to apply. I was always nervous when apply finishes to my woodworking projects and it held me back. The process to apply the Osmo is very simple and foolproof. This type of hard wax oil finish has completely replaced traditional wood finishes like polyurethane in my workshop.
Before we get into the project, make sure to follow me on YouTube, Facebook, Instagram, and TikTok to keep up with all my latest projects!

Materials/Supplies

Check Out This Project On YouTube
Surface Prep
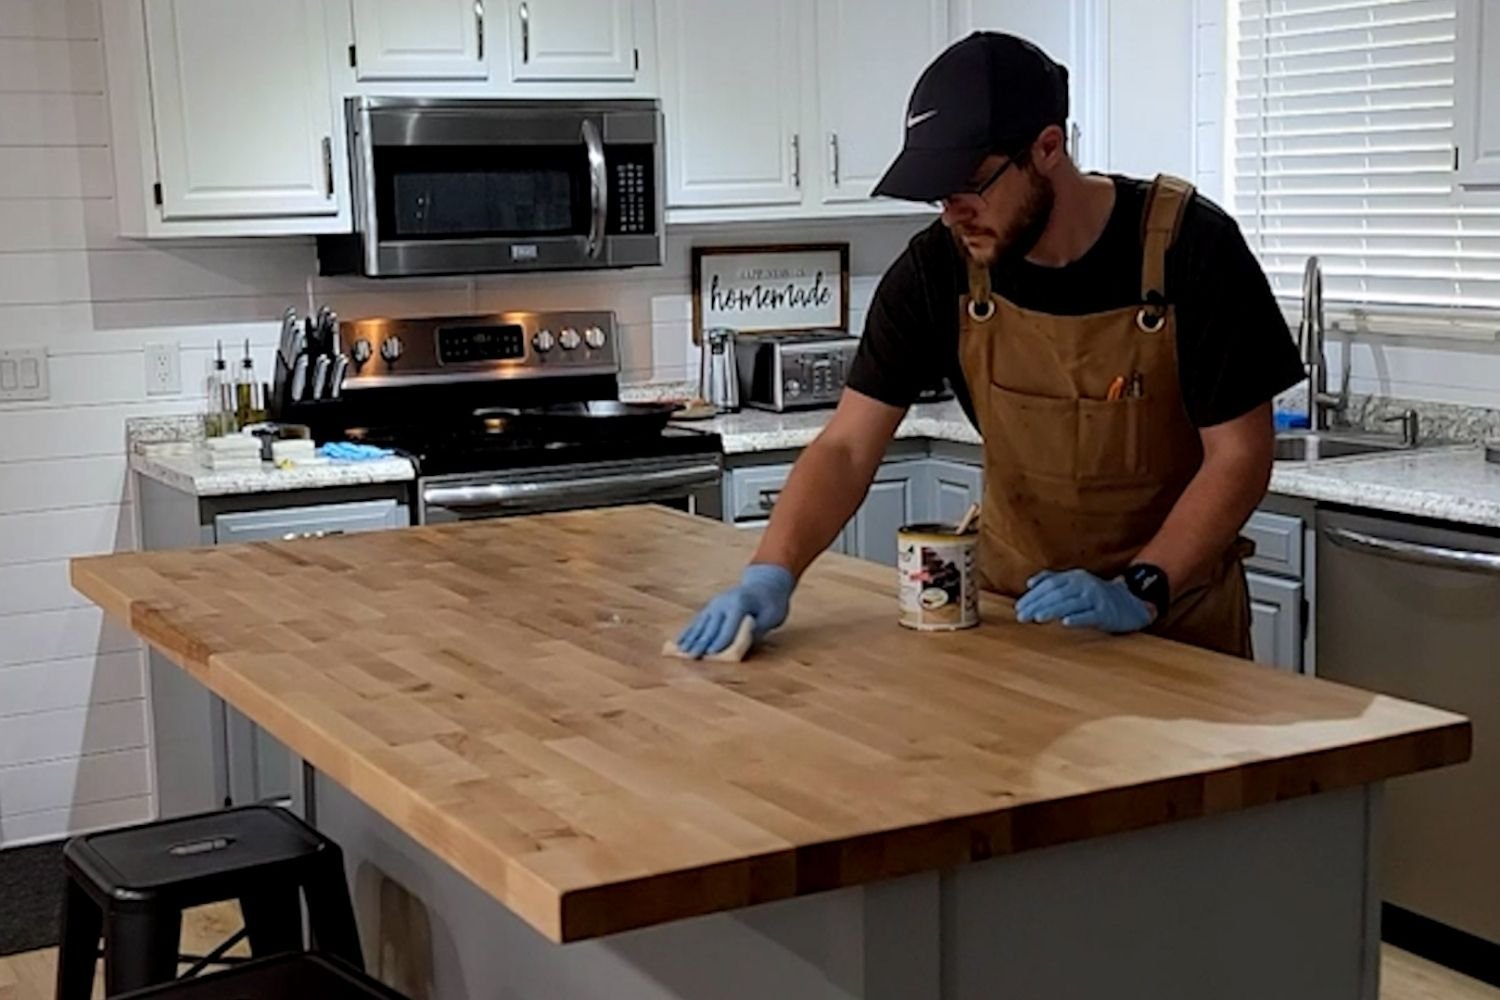
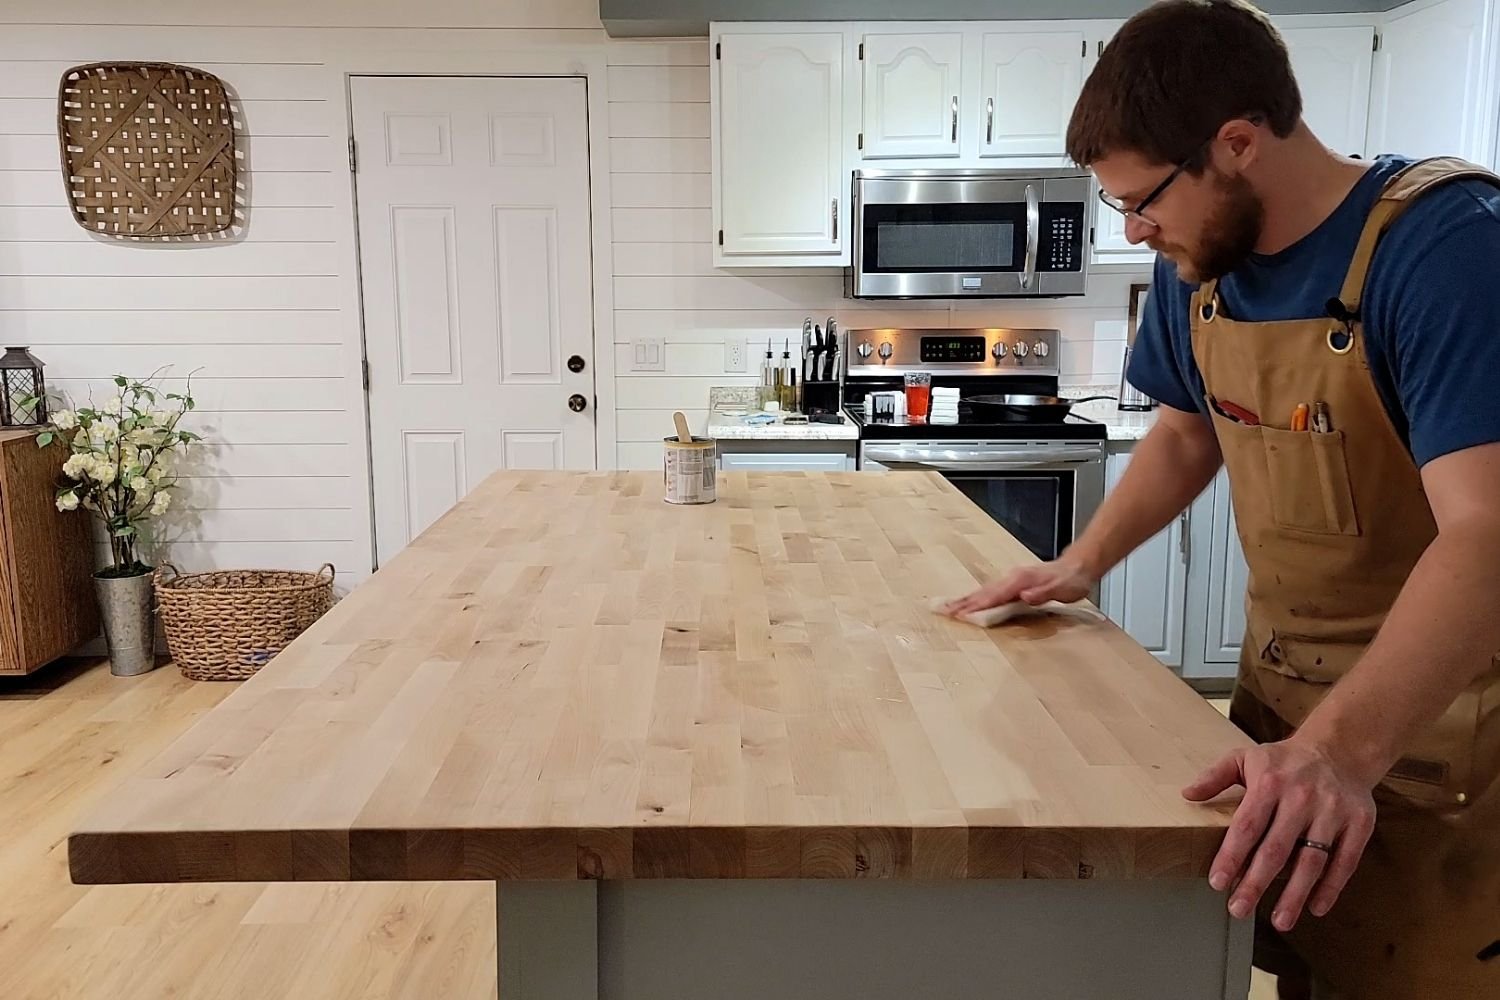
The first step is to prepare the surface that you're going to be applying the finish to. In this case, it's my butcher block island. Which has been sanded to 220 grit sandpaper. You will also want to remove any of the remaining dust particles which is easily done with a tack cloth. I have an entire video and article dedicated to getting the surface prepped for the OSMO finish which you can find here.

What You Need
What we're going to be applying the finish with are these 3M final finishing pads. What I like to do is cut them in half and it just makes them a little easier to work with.

Before we apply the finish, we need to make sure that the Osmo is really well mixed up, especially since it's an oil wax mixture. The wax tends to settle at the bottom of the can.

Applying The Finish
The key to Osmo is applying with a very light coat. So what we're going to want to do is take the 3M finishing pad and lightly dip it into the can, and then we're going to buffet on in a circular and figure eight pattern.

One of the best things about the Osmo finish is that you can do it inside. It's not going to have the toxic chemicals and fumes from off gassing similar to polyurethane or poly acrylic. And what we're doing here is just working the finished into the wood and not allowing any excess to build up on top of the surface. Keep in mind the steps in this video apply to any type of variant of the poly x oil, whether it's the matte satin or gloss finish, they all apply in the exact same way.

Also, make sure to wear gloves when applying the finish, if not your hands will be covered in wax. Once you have a light coat on your entire work piece, wait about 5 minutes and then come back with another piece of your 3M finishing pad and if your 3M finishing pad does get gummed up. Make sure you grab another one that way you're not just spreading it around.

Important Steps
Now, Osmo does require two coats, so you have to wait at least 8 to 10 hours before applying the second coat, and we're going to use the same exact steps as before. As a reminder, make sure that you're going back over your work piece with a clean finishing pad to remove any of the excess.
By not removing the excess, the wax will build up on the surface of your project. It'll become sticky and attract all kinds of dust and debris. One of the best features about the Osmo finish is that it's repairable. In the case of a major accident, spill, or some kind of stain, all you need to do is re-sand your work surface back up to 220 grit, and reapply the Osmo. After your second coat, you're going to want to wait at least 24 hours before using the project that you're applying it to.

Does It Hold Up
Now, if you're wondering how well the Osmo finish holds up. I actually built stepstools for my kids five months ago, and they've seen some pretty heavy use with water drying on top of them, as well as toothpaste, and to be quite honest, they look exactly like I did when I finished them. I plan to do a long term review on how well the OSMO holds up so head over to my YouTube channel and subscribe for the future video!

Related Articles


If you have any questions, comment below.
Let’s talk about it!